

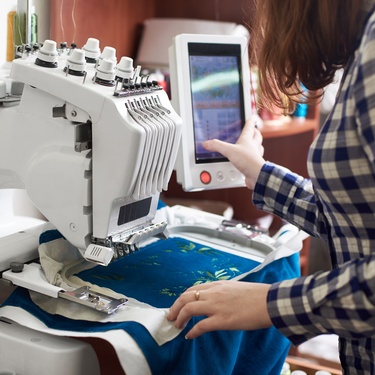
Machine embroidery can transform ordinary fabric into stunning works of art, but success requires understanding the fundamentals. Here are four machine embroidery tips you should know. Whether you’re personalizing gifts or creating custom apparel, these essential techniques will elevate your embroidery projects from amateur to professional quality.
Choose the Right Stabilizer for Your Project
Different fabrics require different stabilizer types to prevent puckering, stretching, and distortion during stitching.
Tear-away stabilizers work well for stable fabrics like cotton and denim, while cut-away options provide permanent support for stretchy materials like knits and polo shirts. Water-soluble stabilizers excel when you’re working with delicate fabrics or creating freestanding lace designs.
Always use enough stabilizer to support your design’s density. Heavy designs with lots of fill stitching need more support than simple outline designs.
Master Proper Hooping Techniques
Correct hooping prevents fabric movement and ensures design accuracy. The fabric should feel drum-tight in the hoop without being stretched or distorted.
Start by placing the outer hoop flat on your work surface, then lay your stabilizer and fabric on top. Then, press the inner hoop down firmly and evenly.
Check that your fabric grain runs straight within the hoop. Crooked hooping leads to crooked designs that you can’t correct during stitching. When stitching on faux embroidery leather or other thick materials, you may need to loosen the hoop slightly to accommodate the material’s thickness while maintaining proper tension.
Select Quality Thread and Needles
Thread quality affects your finished embroidery’s appearance and durability. High-quality polyester or rayon threads provide vibrant colors and smooth stitching. Conversely, cheap threads break frequently, create lint buildup, and produce uneven stitches that diminish your project’s professional appearance.
Match your needle to your thread and fabric combination. Size 75/11 needles work well for most standard embroidery threads on cotton fabrics. Heavier threads or denser fabrics require larger needles, while delicate fabrics need smaller ones. Replace needles regularly because dull or damaged needles create poor stitch quality and can damage your fabric.
Plan Your Design Placement Carefully
Proper design placement ensures your embroidery looks intentional and professional. Mark your fabric’s center point and align it with your hoop’s center marks. Consider the garment’s construction when placing designs on shirts, avoiding seams and pockets that interfere with hooping.
Test your design placement by creating a paper template or using temporary marking tools. Always measure twice and stitch once. Take time to visualize how the finished design will look on the completed item, considering factors like necklines, buttonholes, and wearing comfort. This extra time will pay off in the quality and appeal of your final embroidery project.
These four tips you should know provide the groundwork for beautiful machine embroidery projects. Success comes from understanding how each element works together to create professional results.
Bio: Casey is a passionate copyeditor highly motivated to provide compelling SEO content in the digital marketing space. Her expertise includes a vast range of industries from highly technical, consumer, and lifestyle-based, with an emphasis on attention to detail and readability.